If you have arrived at this activity after finishing the introduction, What is SkyServer?, remember that a constellation is more than a collection of stars that we imagine look like an object in the sky (identifying and naming constellations was one of our ancestors’ earliest attempts to assign a location to objects in the sky). For astronomers, constellations include the region of space surrounding a familiar group of stars. This activity, however, is not intended to teach you about the constellations. The purpose of this activity is to use the constellations as a way to quickly locate a unique place in the database to study.
On a very dark night it is possible to see a thousand stars or more. The SDSS database contains millions more stars, galaxies, and clusters of stars. There is so much to study and learn. With so many locations to choose from, each person should get his or her own region of space to explore. Constellations provide us a great starting point.
Choose a Constellation
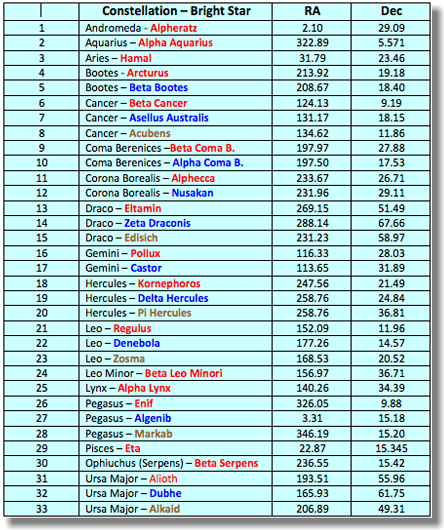
Below is a list of many of the constellations where SDSS has taken images. Next to the name of each constellation is the name of a bright star that is part of that constellation AND was imaged by the SDSS telescope. Just because the constellation is listed does not mean that the entire constellation has been covered, however, so begin by choosing a constellation and bright star from the list below.
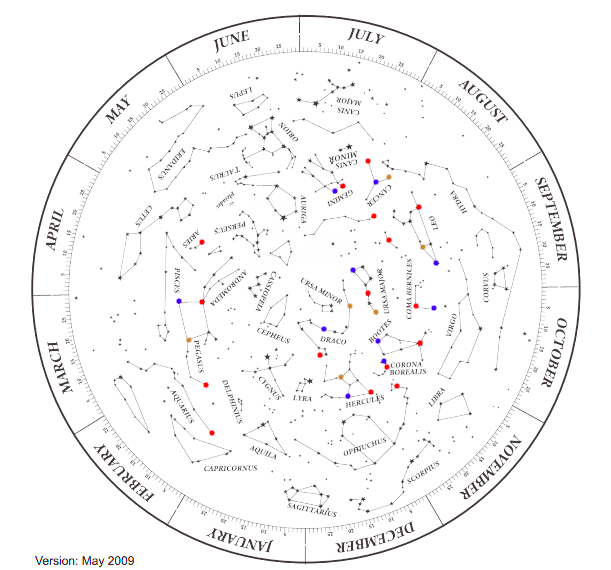
You can use a star finder to see how the stars and constellations move across the sky over time. We have created a special version of the popular Uncle Al’s Star Wheel with the stars from the chart above clearly marked. You can use this star wheel as you would the original to learn about the motion of your constellation. The star wheel image above opens a larger version in a new page. From this page, just click on the star you want as your starting place. You will be taken to that star’s location in the Navigate tool. Each one of these stars is very bright. Zoom out several clicks to see past the glare of these bright objects. Stop here, or continue with the activity to learn more about the Navigate tool and how to save interesting objects to the Notebook.
Explore and Record
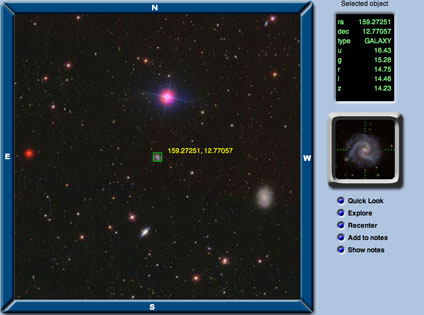
Once you have zoomed out from your very bright starting point, use the direction buttons (N,S,E,W) to nudge your field of view to a slightly different location. When you find a region of space that looks interesting to you, click on an object that you would like to be the center of your special place in the database and select Recenter. Notice that the RA and Dec for that object now appears in the Parameters box and the Selected object window. Keep this RA and Dec. It can serve as a unique starting point for many future activities.
From this point in space, select and record a number of different objects.
- Click on an object of interest
- If you want to save an object click Add to Notes
- Observe the changes in the Selected Object window
Be careful when you are trying to select a galaxy core. You might need to zoom in a couple clicks so that you can accurately select the center of the galaxy. It is very easy to miss the center and get information about stars in the arms of the galaxy. Both types of information are interesting, but zooming in gives you more control over what you select. The SDSS identifies galaxies based upon their cores. Selecting other locations returns an identification of STAR for the type in the Selected object window.
When you have gathered as many objects as you would like, select Show notes. Next, we will see what we can do with this information and how it can be saved.
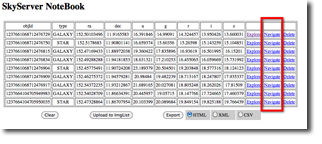
Working with Notebook
The NoteBook is a great way to collect different objects as you move around in Navigate. The contents of your NoteBook are saved from one session to the next until you clear its contents. If you are on a networked computer (at a school, for example) you may find that your NoteBook does not remain intact from one day to the next. Either way, it is a good idea to save the contents of your NoteBook to be used later. The easiest way to do that is to use the Export button to save the data as a web page that you can open and use at any time:
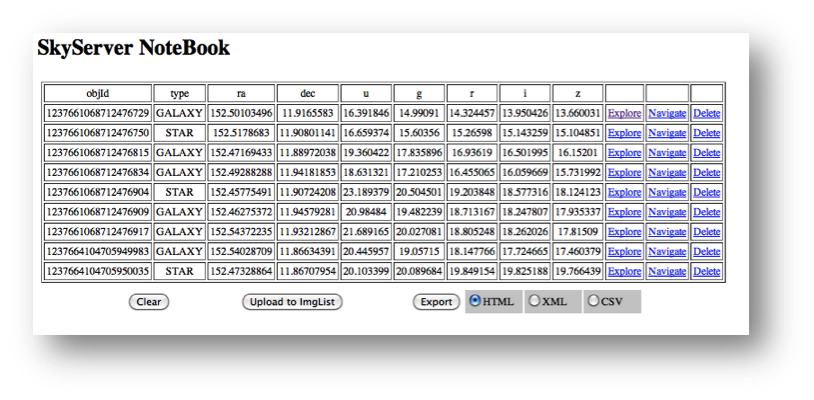
- Select the HTML radio button
- Click Export
- Name your file something memorable like “Amazing Data” or something scientific like the RA and Dec of the center of your search, “159.5_11.45”
There are times when astronomers want to open this information in a spreadsheet program such as Excel. To do that you must export the table in a special format called CSV. Just select the CSV radio button and then Export. This feature is used in some of the more advanced projects in the Expeditions section of this website. For now, we will be working exclusively from this web page. Let’s see what else we can discover.
What Can We Do From NoteBook?
With your NoteBook saved as a web page (HTML file) that can be opened in a browser, you can reconnect to your special place in the database anytime you would like. Simply click any of the Navigate links on the page. This will take you to the Navigate window with the object you selected at the center position.
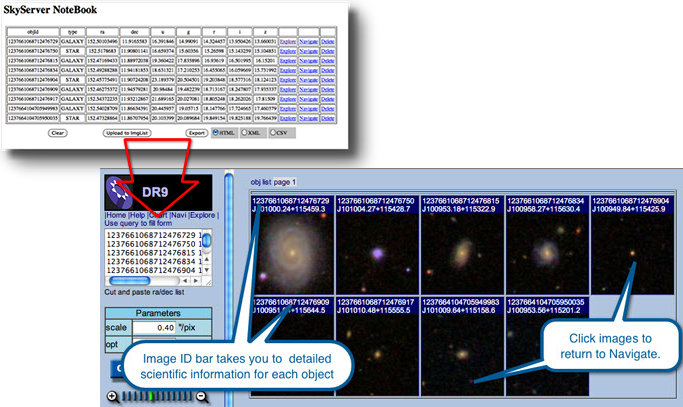
One last tool you will find very helpful is the Upload to ImageList button. This command will open your entire NoteBook as a series of images. Try it.
You can return to the Navigate window for each object by clicking its image in Image List. Clicking the numbers above each image will take you to a scientific page of detailed information. This page is called Explore. We will use this tool for Expedition projects only.
Next Steps
You now have your own unique location in the database that you can use in future voyages and understand how the NoteBook can be used to collect and access information about objects. Observe the objects you collect or return to what interested you about this region to begin with. What questions come to mind? What would you like to learn more about? Maybe some of the data that was reported is new to you. These questions can be your guides as to where to go next.